
When it comes to remodeling, the ‘one size fits all’ approach rarely works. Imagine a bathroom that caters to everyone’s needs; an inclusive, welcoming, and user-friendly space. That’s what a residential ADA bathroom layout with shower promises.
Understanding ADA Guidelines for Residential Bathrooms
The Americans with Disabilities Act (ADA) is more than just a set of regulations. It’s a comprehensive guide for creating inclusive, accessible spaces for everyone. When planning a residential ADA bathroom layout with shower, several key considerations come into play. Let’s explore these in more depth:
1. Accessible Path to the Bathroom
The journey to an ADA compliant bathroom begins even before one enters the bathroom door. The pathway leading to the bathroom needs to be clear of obstacles, allowing unimpeded passage for everyone, including those who use wheelchairs or other mobility aids. This means wide doorways, smooth flooring, and a logical, clear path from other parts of the home. An obstructed path can prevent or limit the bathroom’s usage, defeating the purpose of a compliant layout.
2. Space for Wheelchairs to Turn (60-inch diameter)
Once inside the bathroom, sufficient space is needed to comfortably accommodate a wheelchair. According to ADA guidelines, a wheelchair requires a 60-inch diameter to make a 180-degree turn. This space allows the user to enter, turn around, and exit without difficulty. This might seem like a lot of space, but it’s critical for mobility and independence within the bathroom. The layout should be planned to accommodate this need, even in smaller bathroom spaces.
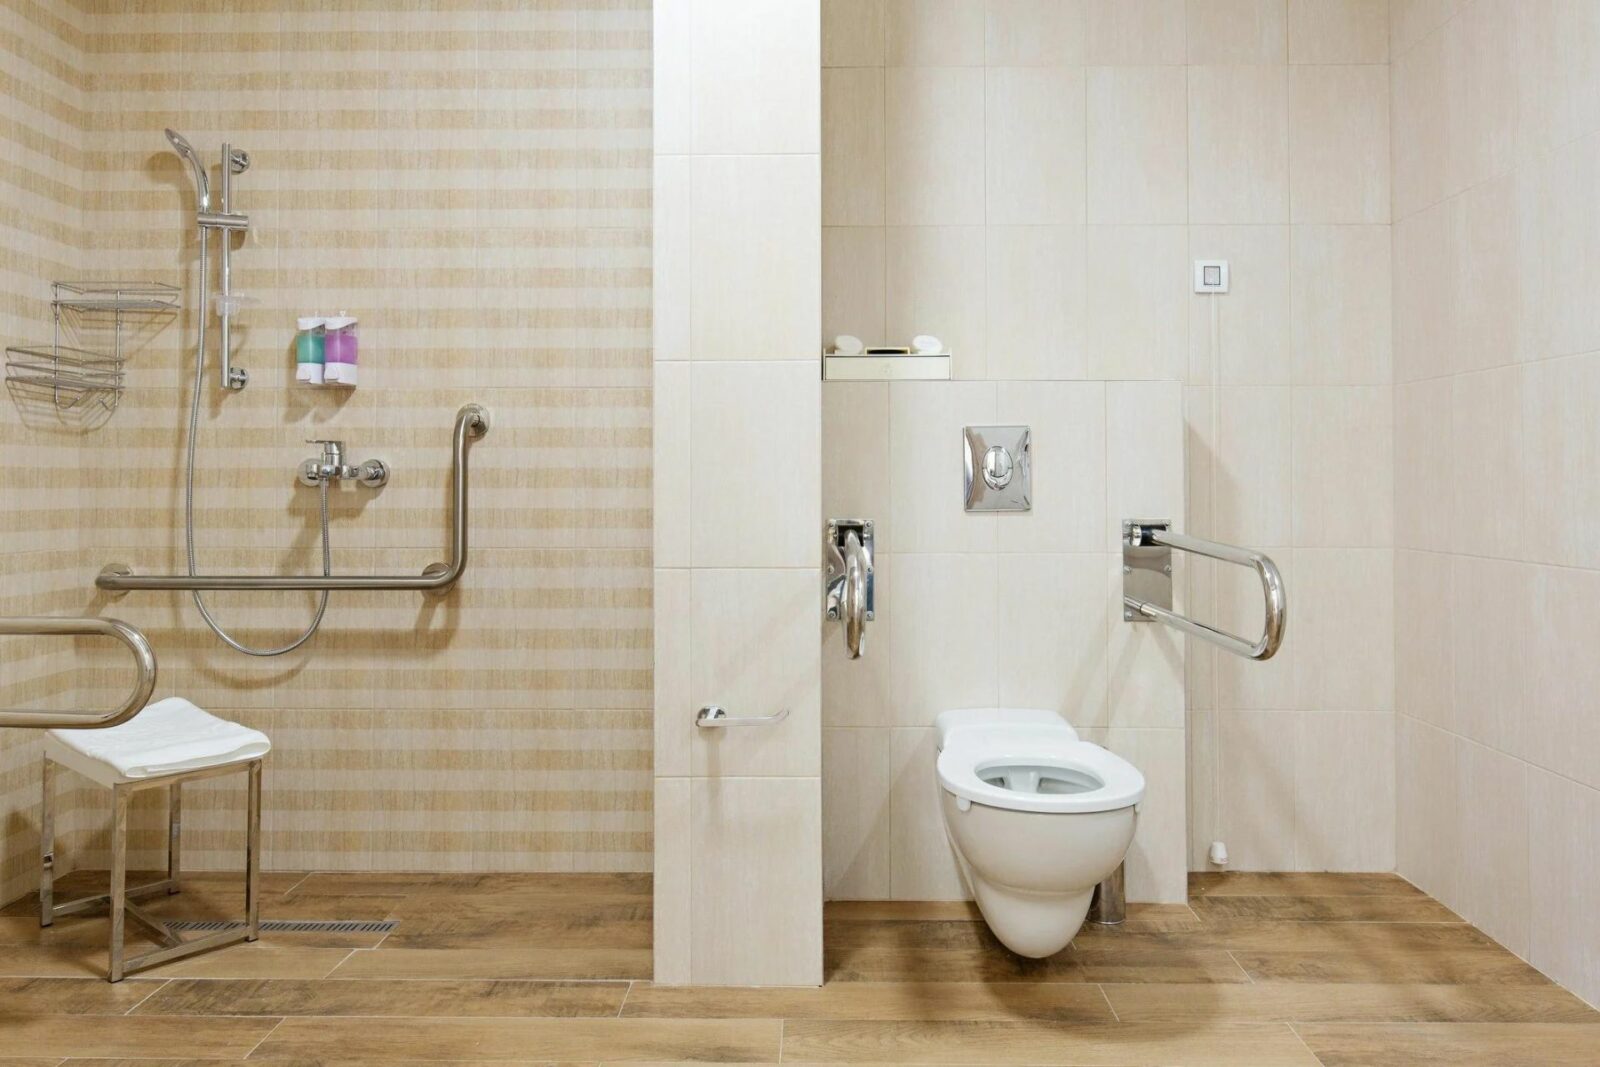
3. Shower and Bath Controls Reachable from a Seated Position
Accessibility doesn’t end with entry and mobility within the bathroom. The fixtures and controls also need to be accessible. This means that all controls, dispensers, and other equipment should be placed within reach from a seated position, usually between 15 to 48 inches from the floor. It includes shower controls, bath faucets, soap dispensers, and even towel hooks. This allows a person sitting down, perhaps in a wheelchair or on a shower bench, to control the water, temperature, and access all necessary items without needing to stand or strain.
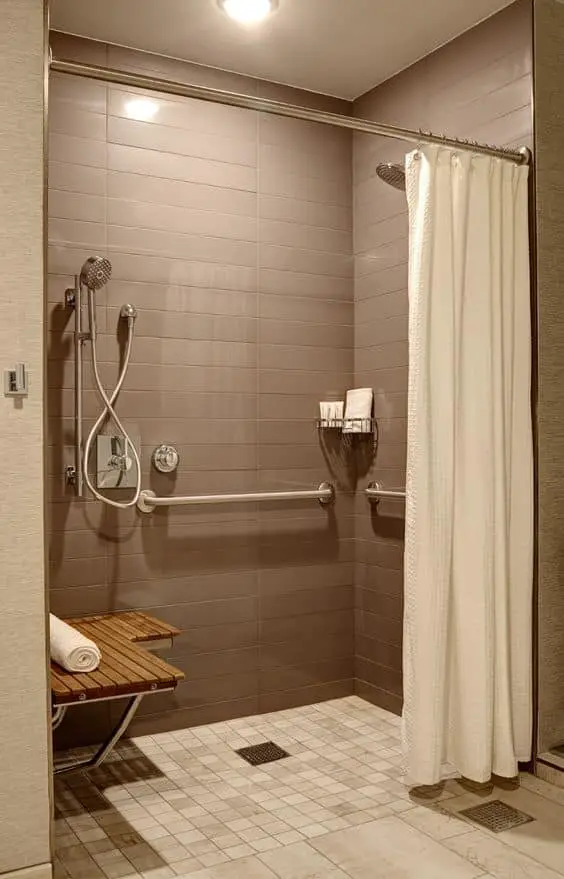
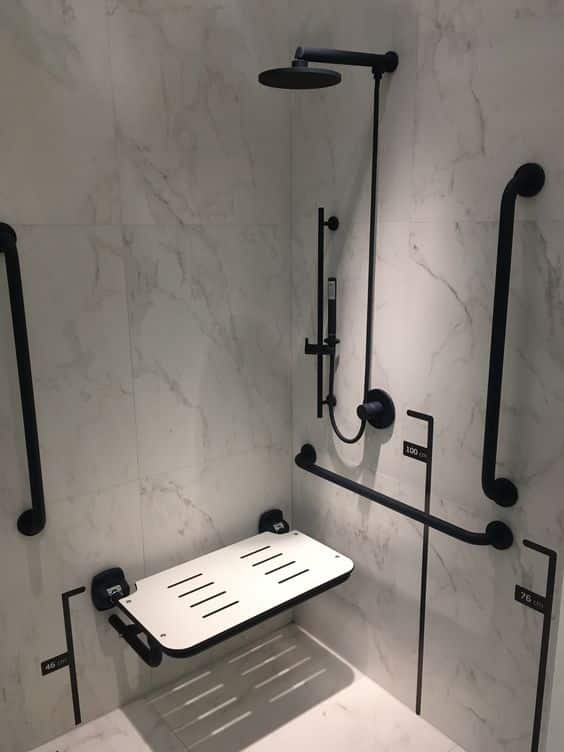
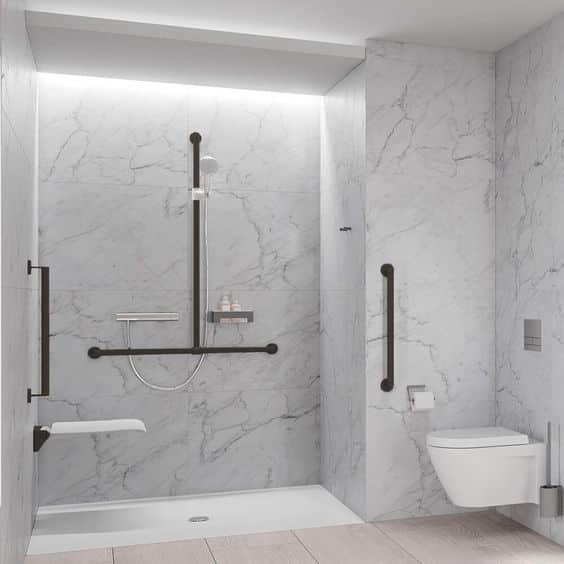
4. Grab Bars Installed Where Needed
Grab bars provide necessary support and balance, helping to prevent falls and aiding in movement around the bathroom. They should be installed around the toilet, bathtub, and shower areas, providing support for transitions such as standing or sitting. The ADA provides detailed guidance on grab bar installation, including height, location, and even the bar’s diameter. It’s crucial to adhere to these guidelines for safety and usability.
Understanding these ADA guidelines for residential bathrooms is the first step towards creating an inclusive and accessible space. They are not just a list of rules, but a roadmap to a safer, more inclusive home that respects everyone’s needs and abilities.
Planning a Residential ADA Bathroom Layout with Shower
Planning an ADA bathroom layout can feel like a giant puzzle, but it doesn’t have to be. A residential ADA bathroom layout with shower requires planning with care. First, measure your available space. Then, consider who will use the bathroom. Last but not least, consult with a professional.
Practical Examples of ADA Bathroom Layouts
Designing an ADA compliant bathroom doesn’t mean sacrificing aesthetics. Here are some practical examples of ADA bathroom layouts that beautifully blend functionality with style:
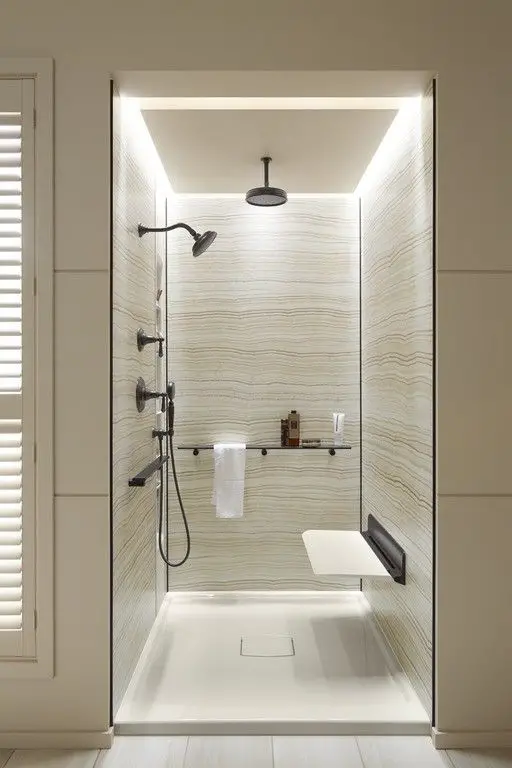
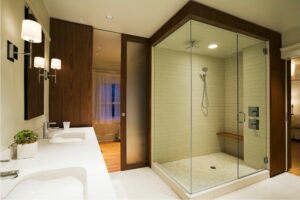
1. An Open Bathroom with a No-Threshold Shower and a Floating Sink
This design embraces open space. The no-threshold shower eliminates the usual step-up, allowing for easy access, especially for wheelchair users or those with limited mobility. The shower floor and the bathroom floor are at the same level, and a properly placed drain prevents water from flooding the rest of the bathroom.
The floating sink, attached to the wall without a cabinet beneath, provides extra legroom. This enables someone seated, like a wheelchair user, to use the sink more comfortably. The sink height should also follow ADA guidelines to ensure it’s accessible from a seated position. Such a design not only caters to ADA guidelines but also contributes to a modern, minimalistic aesthetic.
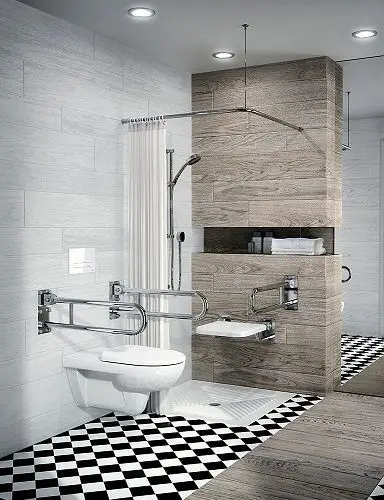
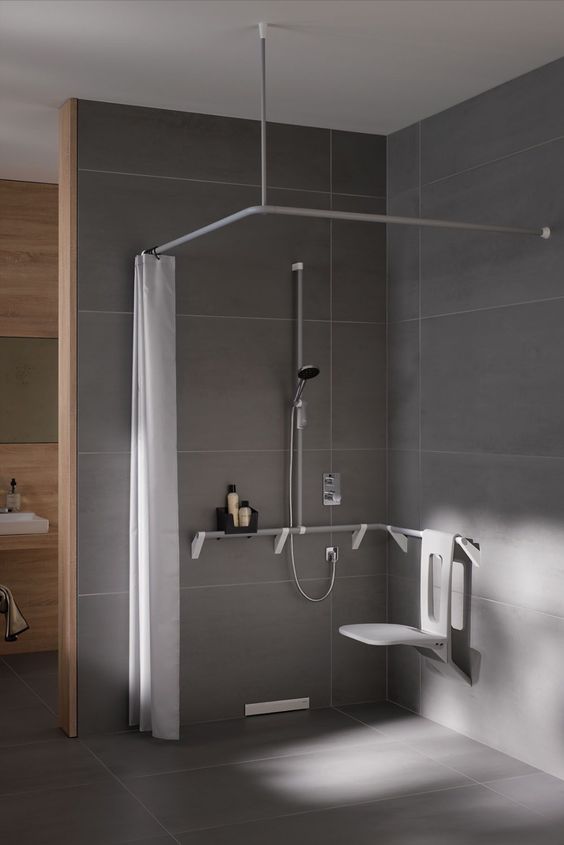
2. A Compact Design where the Shower Area Doubles as Space for Wheelchair Rotation
In smaller bathrooms, space utilization is key. In this design, the shower area doubles up as the turning space for a wheelchair. A shower curtain rather than a door can ensure easy access to the shower without any barriers. The shower’s floor should be slip-resistant, and a nearby grab bar can provide additional support.
This layout requires careful planning to ensure all elements – like shower controls, soap dispensers, and grab bars – are within easy reach from a seated position. Despite the smaller space, this design can still be functional, compliant, and stylish.
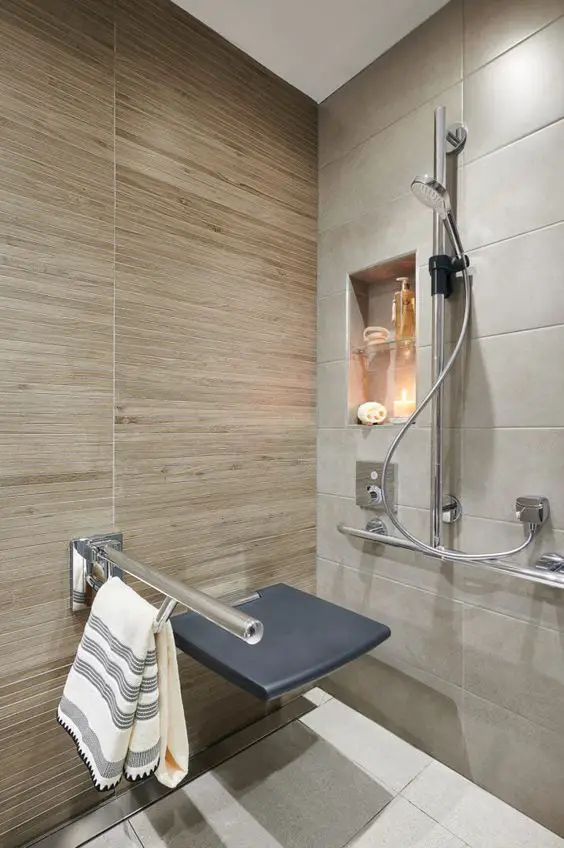
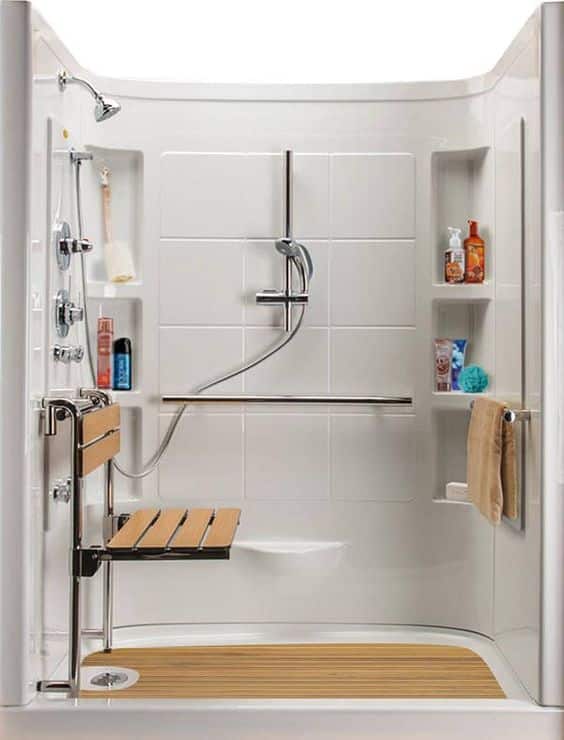
3. A Bathroom with Adjustable Shower Heads and a Fold-Down Seat
This design goes a step further in terms of accessibility and comfort. An adjustable shower head can be moved up or down to accommodate a person’s height, whether standing or seated. This ensures a more comfortable and efficient shower experience for all users.
Additionally, a fold-down seat in the shower area provides flexibility. It can be used as needed, then folded back up against the wall when not in use to maximize space. A person with limited mobility can sit comfortably during a shower, then stow the seat away to make room for others. As always, nearby grab bars are important for support during transitions.
Common Mistakes to Avoid when Designing a Residential ADA Bathroom
Even the best intentions can falter if we’re not well-informed. Here are some common mistakes often made during the design and implementation of a residential ADA bathroom layout with shower:
Mistake 1: Ignoring the need for a non-slip surface.
Safety should be the number one priority when designing an ADA-compliant bathroom. One critical safety feature often overlooked is non-slip surfaces. This is especially important in areas exposed to water, such as the shower and around the sink. Non-slip surfaces help prevent accidents like slips and falls, which are common in bathrooms. Non-slip tiles, anti-slip coatings, or textured surfaces can help ensure safety. Ignoring the need for a non-slip surface can lead to dangerous falls, making the bathroom difficult and unsafe for use.
Mistake 2: Underestimating the importance of grab bars.
Grab bars play a big role in a bathroom that meets ADA standards. They give much-needed help and balance for folks who may struggle with moving about. These bars are super important near the toilet, bathtub, and shower, offering a handhold when standing up, sitting down, or stepping in and out. Sometimes, people who design bathrooms don’t think grab bars are that important or just add them later. But, they should be part of the design right from the start. Where they’re placed should be thought out well, keeping in mind what the person using them needs. Remember, grab bars aren’t just helpful – they can also look good if chosen and put up the right way.
Mistake 3: Not providing enough clearance space.
Space is a crucial aspect of ADA bathroom design. Users, especially those in wheelchairs, need enough space to maneuver comfortably and independently. Failing to provide adequate clearance around fixtures such as toilets, showers, and sinks can limit mobility and accessibility. The ADA guidelines specify a minimum of 60 inches for the turning radius of a wheelchair. This space can also be part of the clear floor space for other fixtures. However, often, designers neglect to incorporate sufficient clearance space, making the bathroom difficult to navigate for wheelchair users. To avoid this, always plan the layout carefully, considering the required turning and clearance space for optimal accessibility.
Conclusion
In today’s home decorating, the new trend is to make spaces that everyone can use, putting a spotlight on including everyone. A great example is the use of a residential ADA bathroom layout with shower. Such a design guarantees that all people, even those with disabilities, can use the bathroom independently and comfortably, which makes the home more inviting. When homeowners choose such designs, they are not only making their homes more accessible but also showing their commitment to inclusivity. So, this move towards designs that work for everyone isn’t just a trend, but a significant change towards a world where everyone can feel comfortable at home.
FAQ Section
What’s the minimum size for an ADA-compliant bathroom?
The Americans with Disabilities Act (ADA) establishes specific requirements to ensure bathrooms are accessible to individuals with disabilities. One of the critical prerequisites is that the bathroom should provide a minimum of a 5-foot diameter for turning space. This ample space allows wheelchair users to maneuver easily and comfortably within the bathroom, facilitating their independence and safety.
Can I DIY an ADA-compliant bathroom?
Sure, you can try to make your bathroom ADA-compliant yourself. But, because the rules are complex and you need to be very accurate, it’s a good idea to ask a professional for help. If you don’t meet the ADA standards correctly, it can create problems for people who need to use the bathroom and could lead to expensive changes later. Experts know how to make sure your bathroom is fully accessible and meets all the necessary rules.
Does my home bathroom need to be ADA-compliant?
No, you don’t have to make your home bathroom ADA-compliant unless you use your home for business or public events. But, it’s a good idea to make your bathroom ADA-compliant, especially if you have family or friends who have trouble moving around. It makes your home a place where everyone can use and feel comfortable.


