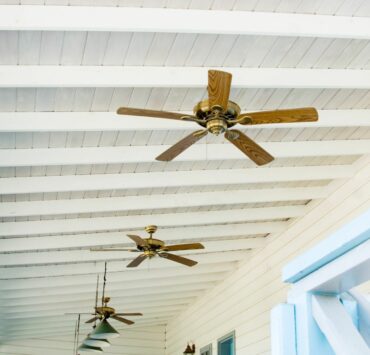
A porch ceiling can add a lot of character and charm to a home. Tongue and groove porch ceilings are a popular choice for many homeowners, as they offer a classic look and feel. In this article, we’ll explore what a tongue and groove porch ceiling is, its pros and cons, the installation process, materials needed, cost, and time needed for installation.
What is a Tongue and Groove Porch Ceiling?
A tongue and groove porch ceiling is a type of ceiling that uses interlocking boards that fit together at the edges. The “tongue” of one board fits into the “groove” of the adjacent board, creating a tight and secure fit. This type of ceiling is popular for porches and outdoor spaces because it provides a seamless and smooth look. The interlocking boards also create a more durable and stable ceiling.
Pros and Cons of a Tongue and Groove Porch Ceiling
There are several advantages of such a ceiling option. For one, it provides a timeless and classic look that can add a lot of character to a home. Additionally, the interlocking boards create a stable and durable ceiling that can withstand weathering and other outdoor elements. However, one potential drawback is that it can be more expensive to install than other types of ceilings.
All About Installation
Installing a tongue and groove porch ceiling is a relatively simple process. Here are the steps you can follow to install a tongue and groove porch ceiling:
Materials Needed:
- Tongue and groove boards
- Measuring tape
- Saw
- Nails or screws
- Hammer or nail gun
- Ladder or scaffolding
Installation Steps:
- Measure the length and width of your porch ceiling to determine how many boards you’ll need.
- Cut the tongue and groove boards to the appropriate length.
- Begin at one end of the porch ceiling and install the first board, with the tongue side facing out.
- Secure the board to the ceiling with nails or screws.
- Continue installing boards in this manner, interlocking the tongue and groove as you go.
- Cut boards as needed to fit the space, using a saw.
- Use a hammer or nail gun to secure each board to the ceiling.
- Continue installing boards until the entire porch ceiling is covered.
- Trim the edges of the ceiling with additional boards or moldings, if desired.
Cost of Installation
The cost of installation can vary depending on a few factors, including the size of the porch, the type of wood used, and the cost of labor in your area. On average, homeowners can expect to pay between $2 and $5 per square foot for materials and installation.
Time Needed for Installation
The amount of time needed for installation will depend on the size of the porch and the experience of the installer. On average, it can take anywhere from one to three days to complete the installation.
In conclusion, a tongue and groove porch ceiling can add a classic and timeless look to your porch. While it may be more expensive to install than other types of ceilings, the durability and stability it provides can make it a worthwhile investment. With the right materials, tools, and installation process, you can enjoy a beautiful and functional porch ceiling for years to come.


