

Wondering how to tighten kitchen faucet? Usually tightening the mounting nut does the trick. However, it does involve a few more steps and you can do yourself without calling a professional plumber. In this blog, we will go through the steps required to tighten your kitchen faucet base.
Materials Required
- Adjustable wrench or a pair of pliers
- Socket wrench (if necessary)
- Screwdriver
- Plumber’s tape
Steps to Tighten Kitchen Faucet
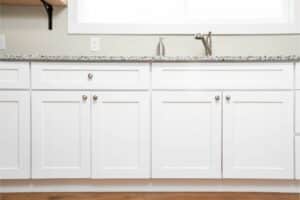
Turn Off the Water Supply
The first step is to turn off the water supply to the kitchen faucet. To do this, locate the shutoff valve underneath the sink and turn it off. If you cannot locate the valve, turn off the main water supply valve to the house.
Remove the Decorative Cap or Handle
Once the water supply is turned off, remove the decorative cap or handle of your kitchen faucet. Depending on the model of your faucet, the cap may need to be pried off with a screwdriver or simply unscrewed by hand. If there is a screw under the cap, use a screwdriver to remove it.
Tighten the Mounting Nut
Underneath the cap or handle, you should be able to see a mounting nut that secures the faucet to the sink. Use an adjustable wrench or a pair of pliers to tighten the mounting nut by turning it clockwise. If the mounting nut is difficult to reach with a wrench or pliers, use a socket wrench to tighten it.
Reattach the Cap or Handle
Once you have tightened the mounting nut, reattach the cap or handle of the kitchen faucet. Make sure the cap or handle is properly aligned and securely in place.
Turn On the Water Supply
After tightening the mounting nut and reattaching the cap or handle, turn the water supply back on. Check the faucet for any leaks or movement. If you still experience wobbling or leaking, repeat the steps above and check to make sure the mounting nut is tightened properly.

Apply Plumber’s Tape
If you notice any leaks around the base of the kitchen faucet after tightening the mounting nut, you may need to apply plumber’s tape. Plumber’s tape is a thin, white tape that can be wrapped around the threads of the mounting nut to create a tighter seal. To apply the tape, simply wrap it around the threads of the mounting nut in a clockwise direction.
In conclusion, how to tighten kitchen faucet has a simple answer. It is a quick task that you can do yourself without calling a plumber. By following the steps outlined above, you can easily fix a wobbly or loose kitchen faucet and prevent further damage to your sink or countertop.
Related posts:
 Can You Paint Tile Backsplash?
 Decor For Kitchen Shelves: How to Add Personality to Your Cooking Space
 Clever Storage Solutions: Small Kitchen Cabinets and the Best Ideas
 How Tall is a Kitchen Island? And Many More Frequently Asked Questions around Islands Answered by Experts
 The Timeless Beauty of White Oak Kitchen Cabinets

