
Whether you’re looking to repair water stains, update the color, or simply give it a clean finish, here are the steps on how to paint a bathroom ceiling.
1. Gather Your Supplies
Before you begin, gather the necessary supplies:
- Paint: Choose a high-quality, moisture-resistant paint specifically designed for bathrooms. A satin or semi-gloss finish is ideal for ceilings as it resists moisture and is easy to clean.
- Primer: If your ceiling has stains or is not previously painted, a primer can help create a smooth surface for the paint.
- Paint Roller: A roller with an extension pole will help you reach high spots.
- Paint Tray and Liners: These make the painting process neater.
- Paintbrush: Use a brush for cutting in along the edges.
- Painter’s Tape: Protect walls and fixtures from accidental paint splatters.
- Drop Cloths: Cover the bathroom floor and fixtures to prevent drips.
- Sanding Block: If needed, use a sanding block to smooth any rough spots.
2. Prepare the Bathroom
Start by clearing the bathroom of any unnecessary items and covering fixtures with drop cloths. Remove light fixtures, if possible, and turn off the electricity to ensure safety.
3. Clean the Ceiling
Clean the ceiling to remove any dirt, dust, or mildew. Use a mixture of warm water and mild detergent. Rinse thoroughly and allow it to dry completely.
4. Patch and Repair
Inspect the ceiling for any cracks or holes. Patch them with a suitable filler, and sand the patched areas smooth once dry.
5. Apply Primer
If your ceiling is unpainted or has stains, apply a coat of primer evenly. This will help the paint adhere better and cover stains effectively. Allow the primer to dry according to the manufacturer’s instructions.
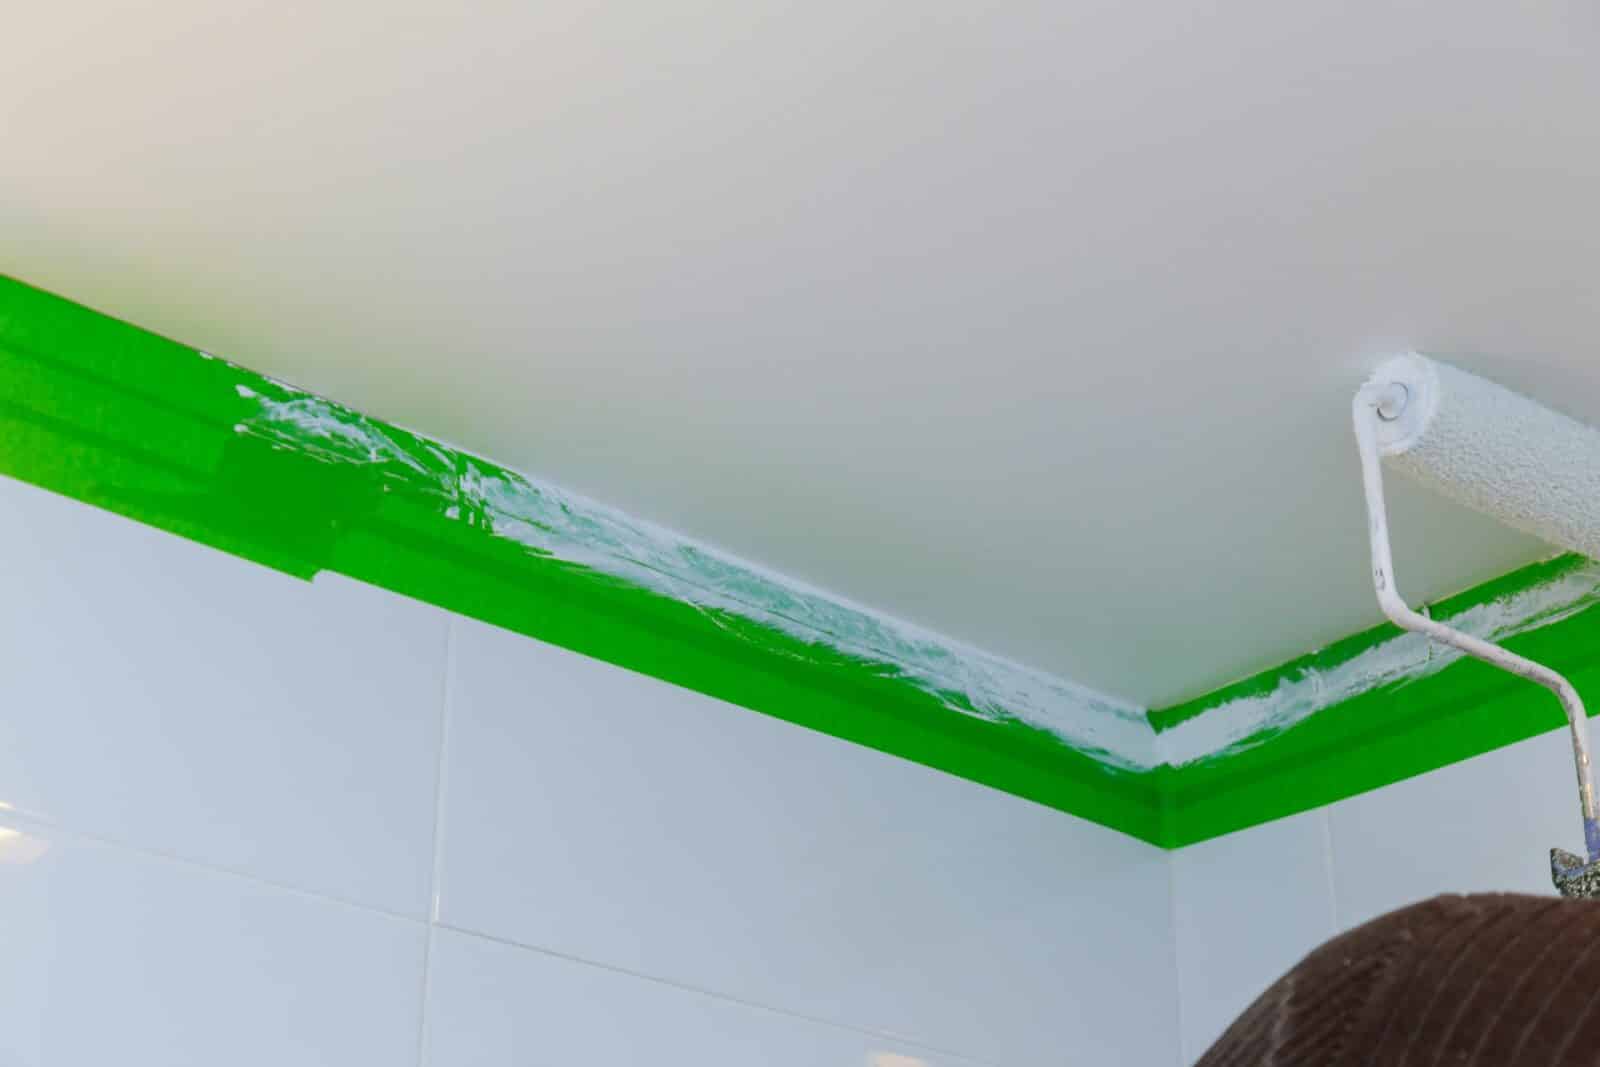
6. Cut In
Using a paintbrush, cut in along the edges of the ceiling where it meets the walls, corners, and fixtures. Be precise to avoid getting paint on surfaces you don’t want to paint.
7. Paint the Ceiling
Dip the paint roller into the paint tray and apply an even coat of paint to the ceiling. Work in sections, rolling in one direction for a uniform finish. Use an extension pole to reach high areas.
8. Allow to Dry
Allow the first coat to dry completely. This may take several hours, so be patient.

9. Apply a Second Coat
For a professional finish, apply a second coat of paint. Follow the same technique as before, ensuring even coverage.
10. Clean Up
Remove painter’s tape and drop cloths carefully while the paint is still slightly tacky to prevent peeling. Clean your brushes and rollers thoroughly with water or paint thinner, depending on the type of paint used.
11. Reassemble and Enjoy
Once the paint is fully dry, reattach any fixtures you removed, and your bathroom ceiling will look fresh and revitalized.
Remember that proper ventilation is crucial during and after painting to help the paint dry and reduce moisture buildup. With these steps, you can transform your bathroom ceiling and give your bathroom a clean and updated look.


