
Building an attic floor can be a transformative project, converting an underutilized space into valuable storage or even additional living space. By adding a sturdy and stable floor to your attic, you can maximize storage capacity while maintaining the structural integrity of your home. Whether you’re looking to store seasonal items, create a home office, or simply want to make the most of your attic space, this step-by-step guide will walk you through how to build an attic floor.
Step 1: Check Building Codes
Before starting, ensure that building an attic floor is permitted in your area by checking local building codes and regulations.
Step 2: Evaluate Structural Support
Determine if the existing attic structure can support the additional weight of the floor, storage items, and potential foot traffic. Consult a structural engineer if needed.
Step 3: Clear the Attic
Remove all existing items from the attic to create a clean and empty workspace, allowing for a thorough inspection of the attic space.
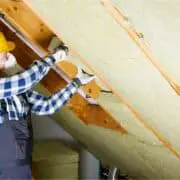
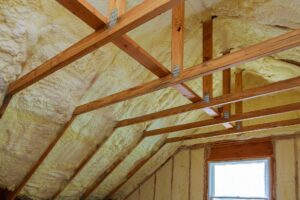
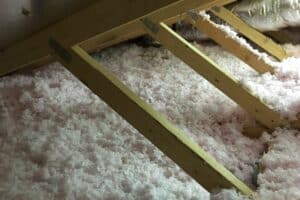
Step 4: Insulate and Seal
If the attic is not already insulated, add insulation between the joists for improved energy efficiency. Seal any gaps or cracks to prevent air leaks.
Step 5: Plan the Flooring Layout
Measure the attic space accurately and plan the positioning of the floor panels to optimize storage capacity.
Step 6: Choose the Flooring Material
Select the attic flooring material based on your needs and budget. Options include plywood, OSB, or attic flooring systems.
Step 7: Prepare the Floor Panels
Cut the panels to the desired dimensions according to your layout plan. Sand the edges to create smooth surfaces.
Step 8: Install the Flooring Material
- For Plywood/OSB: Place the panels over the joists, securing them with screws or nails for a stable fit.
- For Attic Flooring Systems: Follow the manufacturer’s instructions to interlock the panels and create a raised platform.
Step 9: Provide Adequate Support
Add additional support beams or joists if required to ensure the attic floor can handle the intended weight capacity.
Step 10: Address Electrical and HVAC
Ensure that electrical wiring and HVAC systems in the attic are properly insulated and safely managed.
Step 11: Inspect for Safety
Thoroughly inspect the newly installed attic floor for stability and safety. Reinforce connections if needed.
Step 12: Add Guardrails (Optional)
If the attic floor will be used as a living space or accessed frequently, consider adding guardrails for safety.
Step 13: Organize and Store Items
After completing the attic floor, organize and store items systematically to maximize storage space and accessibility.
Step 14: Regular Maintenance
Perform regular checks on the attic floor to ensure it remains in good condition. Address any issues promptly to maintain structural integrity and safety.
Remember, to build an attic floor you will requires careful planning and attention to detail. Seek professional advice or assistance if unsure about any aspect of the process to ensure a safe and successful attic floor installation.


