
When Tiffany, an elementary school teacher turned DIY enthusiast and aspiring children’s book author, moved from DC to Boston, she had a vision. With twin toddlers in tow and a passion for creating a functional yet beautiful home, she decided to transform her giant front porch into a cozy, practical mudroom. This is her inspiring story of a successful porch to mudroom conversion, which she shared on her blog, HeartEyesDIY.
The Dream and the Decision
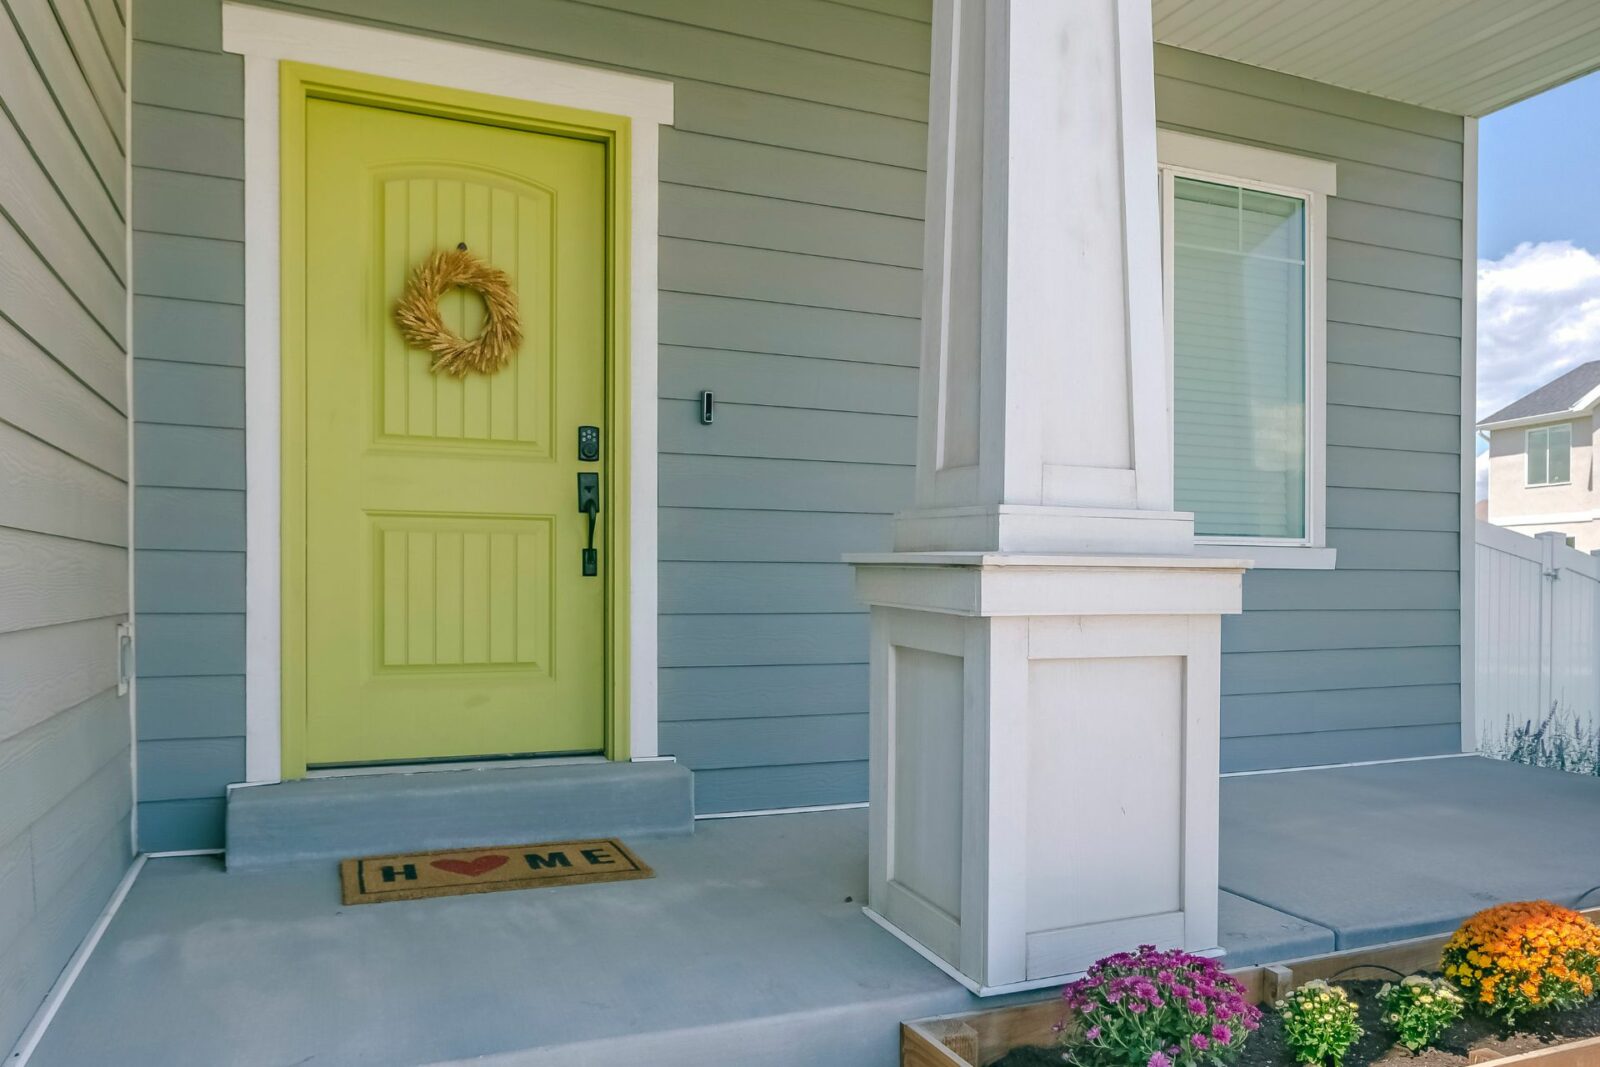
Three years ago, Tiffany and her family relocated to Boston to be closer to loved ones. They seized the chance to renovate an old home, but the house lacked a crucial feature they had grown accustomed to in their previous homes: a mudroom. Instead, the house boasted a large front porch, which they decided to convert into a functional mudroom.
Demo and Reconstruction
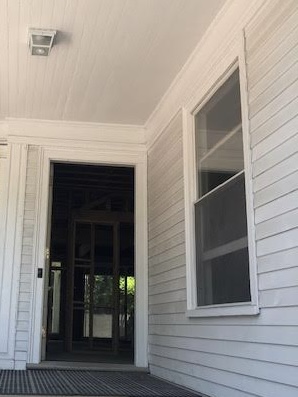
The first step in the porch to mudroom conversion was demolition. Tiffany and her team began by removing the beadboard and crown from the ceiling, the railing on the porch’s side, the supporting pillars, and the decking. The siding, window frame, and door frame were also removed, with the window boarded up to become an interior wall.
Next, new structural supports were installed, including floor joists, a subfloor, wall studs, and a new framing for the relocated front door. With the framing complete, new walls and windows were installed, bringing in a flood of natural light.
Inspiration and Design
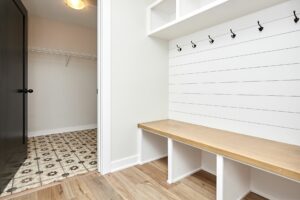
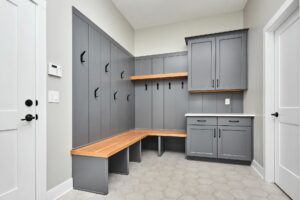
While construction was underway, Tiffany was busy designing the mudroom. Initially, she envisioned a bench flanked by tall closets. However, after several iterations and inspiration from various design photos, she opted for an L-shaped bench near the entry. This layout provided a feeling of openness and better flow.
Bringing the Design to Life
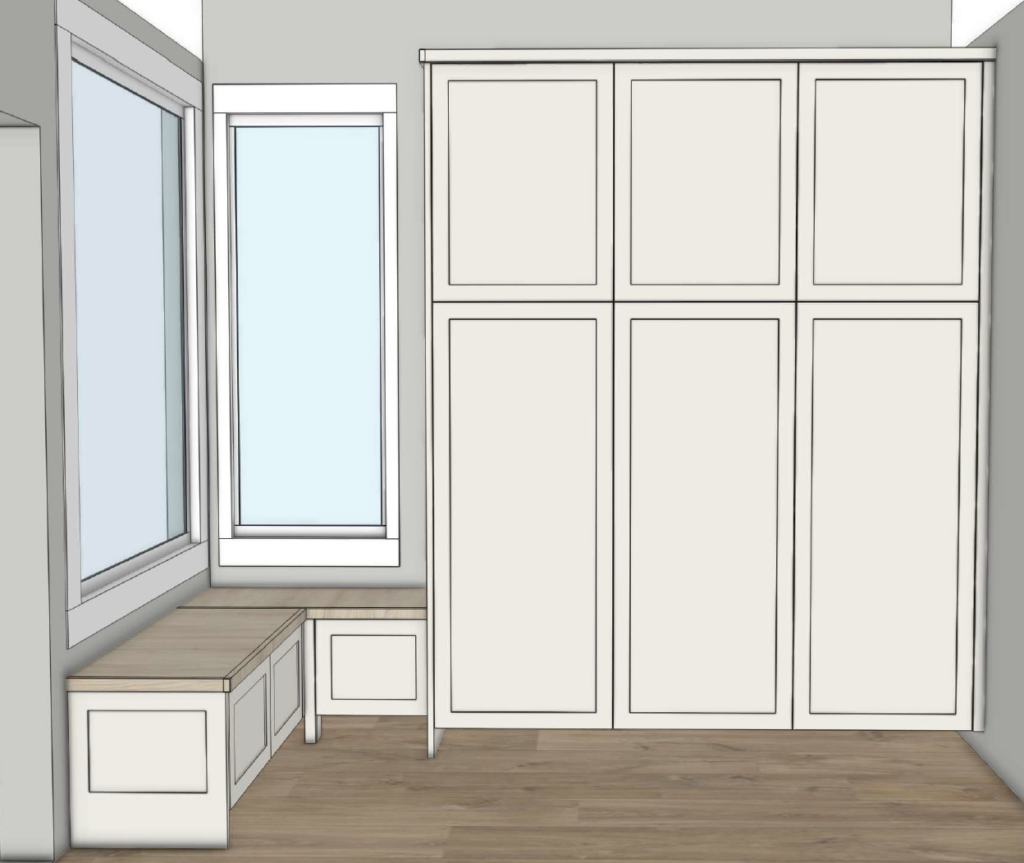
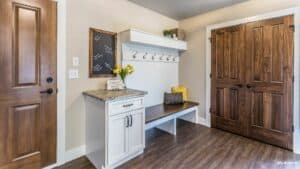
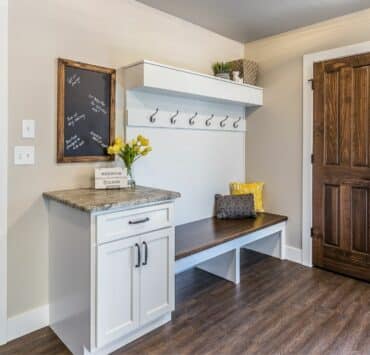
Tiffany’s final design included a blend of elements from various mudrooms she admired. She incorporated drawers beneath the bench for shoe storage, cabinetry extending to the ceiling, and vented cabinet doors for airflow. After some revisions, the design was brought to life with detailed renderings, ensuring every element was perfect.
Flooring, Hardware, and Lighting
For the flooring, Tiffany chose charcoal-colored star and cross tiles that offered both beauty and practicality. The hardware selection process led her to choose Satanga Edge Pulls for their subtle and discreet look. Lighting took some time to decide, but eventually, the Rejuvenation Blaine Pendant in Sherwin Williams Evergreen Fog color was the perfect choice, adding a touch of elegance to the space.
The Final Build
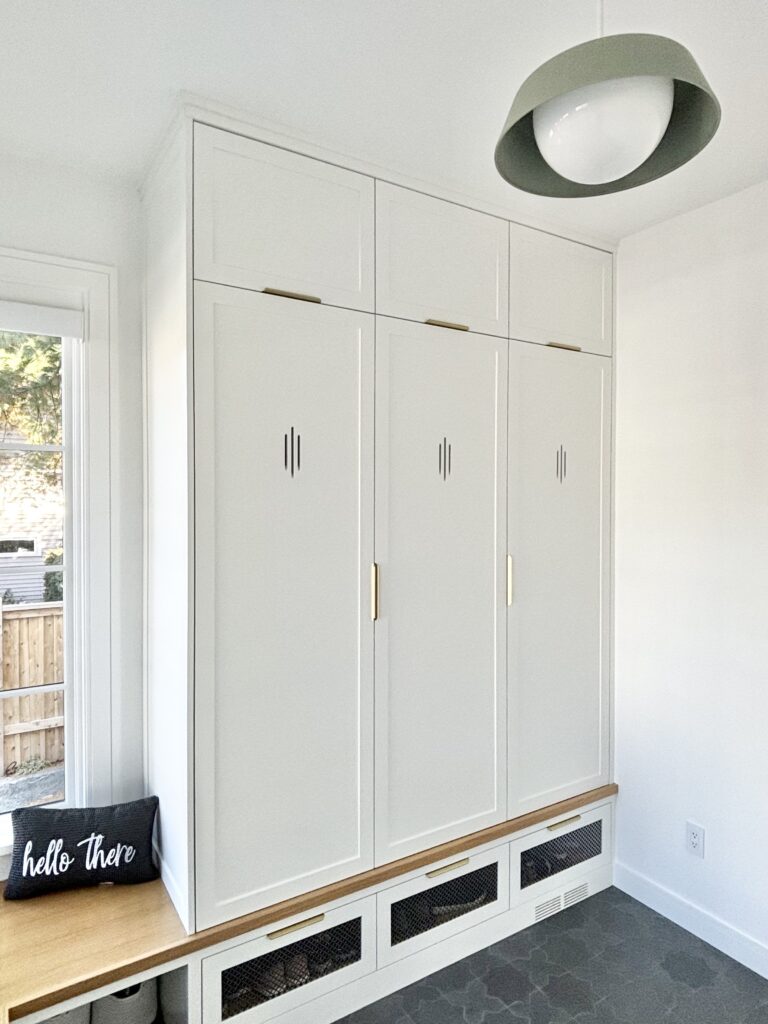
Once all design decisions were finalized, the millwork began. The tile, baseboards, and trim were installed first, followed by the bench, cabinetry, and drawers. The drawer faces were cut out for metal mesh, and the chosen pulls were installed. Despite some delays, the final mudroom was a cozy, functional space that the family used daily.
Tiffany’s journey of converting a porch into a mudroom was a labor of love, resulting in a space that combines practicality and beauty. Her story is a testament to the power of vision and dedication in home renovation projects.
Step-by-Step Guide to a Successful Porch to Mudroom Conversion
- Planning and Design:
- Assess your needs and envision the final look.
- Sketch your design ideas and gather inspiration from various sources.
- Decide on the layout, including bench, storage, and lighting.
- Demolition:
- Remove existing structures like railings, pillars, and decking.
- Remove siding, window frames, and door frames as needed.
- Structural Work:
- Install new floor joists and subfloor.
- Frame new walls and a relocated door.
- Construction:
- Install new walls, windows, and a temporary door.
- Apply drywall and paint.
- Interior Design:
- Choose flooring that is durable and aesthetically pleasing.
- Select hardware like cabinet pulls and lighting fixtures.
- Millwork:
- Install cabinetry, bench, and storage solutions.
- Finish with trim, baseboards, and any additional millwork details.
- Final Touches:
- Install chosen lighting fixtures.
- Add personal touches and decorations to make the space your own.
Related posts:
 Creating a Functional and Stylish Basement Mudroom
 Mudroom Locker Ideas: Creating a Functional and Organized Space
 Do It Yourself Mudroom Storage: Ideas for a Customized Space
 Mudroom Closet Organizer: Tips and Ideas for a More Functional Space
 How to Build Lockers for a Mudroom: A Step-by-Step Guide