
Before going into dive into different ways to how to waterproof wood, let’s first start answering the most asked questions about waterproofing woods then we will explain in detail how to waterproof wood, when to do it and also what are the precautions you should take before tackling it:
Let’s first answer the questions.
1. What Type of Waterproofing Product Should I Use?
- Different projects may require different types of waterproofing, such as sealants, stains, or paint. The choice depends on factors like the wood’s location, appearance preferences, and environmental considerations.
2. How Often Should I Reapply a Waterproofing Treatment?
- The frequency of reapplication varies based on the product used, exposure to weather, and wear and tear.
3. Can I Waterproof All Types of Wood?
- While most wood can be waterproofed, different types of wood may require specific treatments. The instructions on the product and expert advice can provide guidance.
4. How Do I Prepare the Wood for Waterproofing?
- Proper preparation, including cleaning, sanding, and drying, is key for effective waterproofing.
5. How Long Does Waterproofing Last?
- The longevity of waterproofing depends on factors like the quality of the product, application method, environmental exposure, and maintenance.
6. Does Waterproofing Change the Appearance of the Wood?
- Some products, like clear sealants, may not alter the wood’s appearance, while others, like stains or paint, can change the color and texture.
7. How Long Should I Wait Before Using the Waterproofed Wood?
- Drying times vary based on the product and environmental conditions. Following the manufacturer’s instructions is crucial.
8. Is Waterproofing Wood Environmentally Safe?
- Some products are more environmentally friendly than others. Researching and selecting products with lower volatile organic compounds (VOCs) can be a greener choice.
9. Can I Waterproof Wood Myself, or Should I Hire a Professional?
- Many waterproofing tasks can be done DIY with proper instructions and safety precautions, but complex or large-scale projects might benefit from professional expertise.
10. What Safety Precautions Should I Take When Waterproofing?
- Proper handling, PPE usage, and adherence to product guidelines are key to ensuring safety during the waterproofing process.
11. How Can I Maintain the Waterproofing Effect?
- Regular inspection and proper maintenance, including cleaning and potential reapplication, are part of keeping wood waterproofed over time.
Now let’s dive into each section:
How to Waterproof Wood
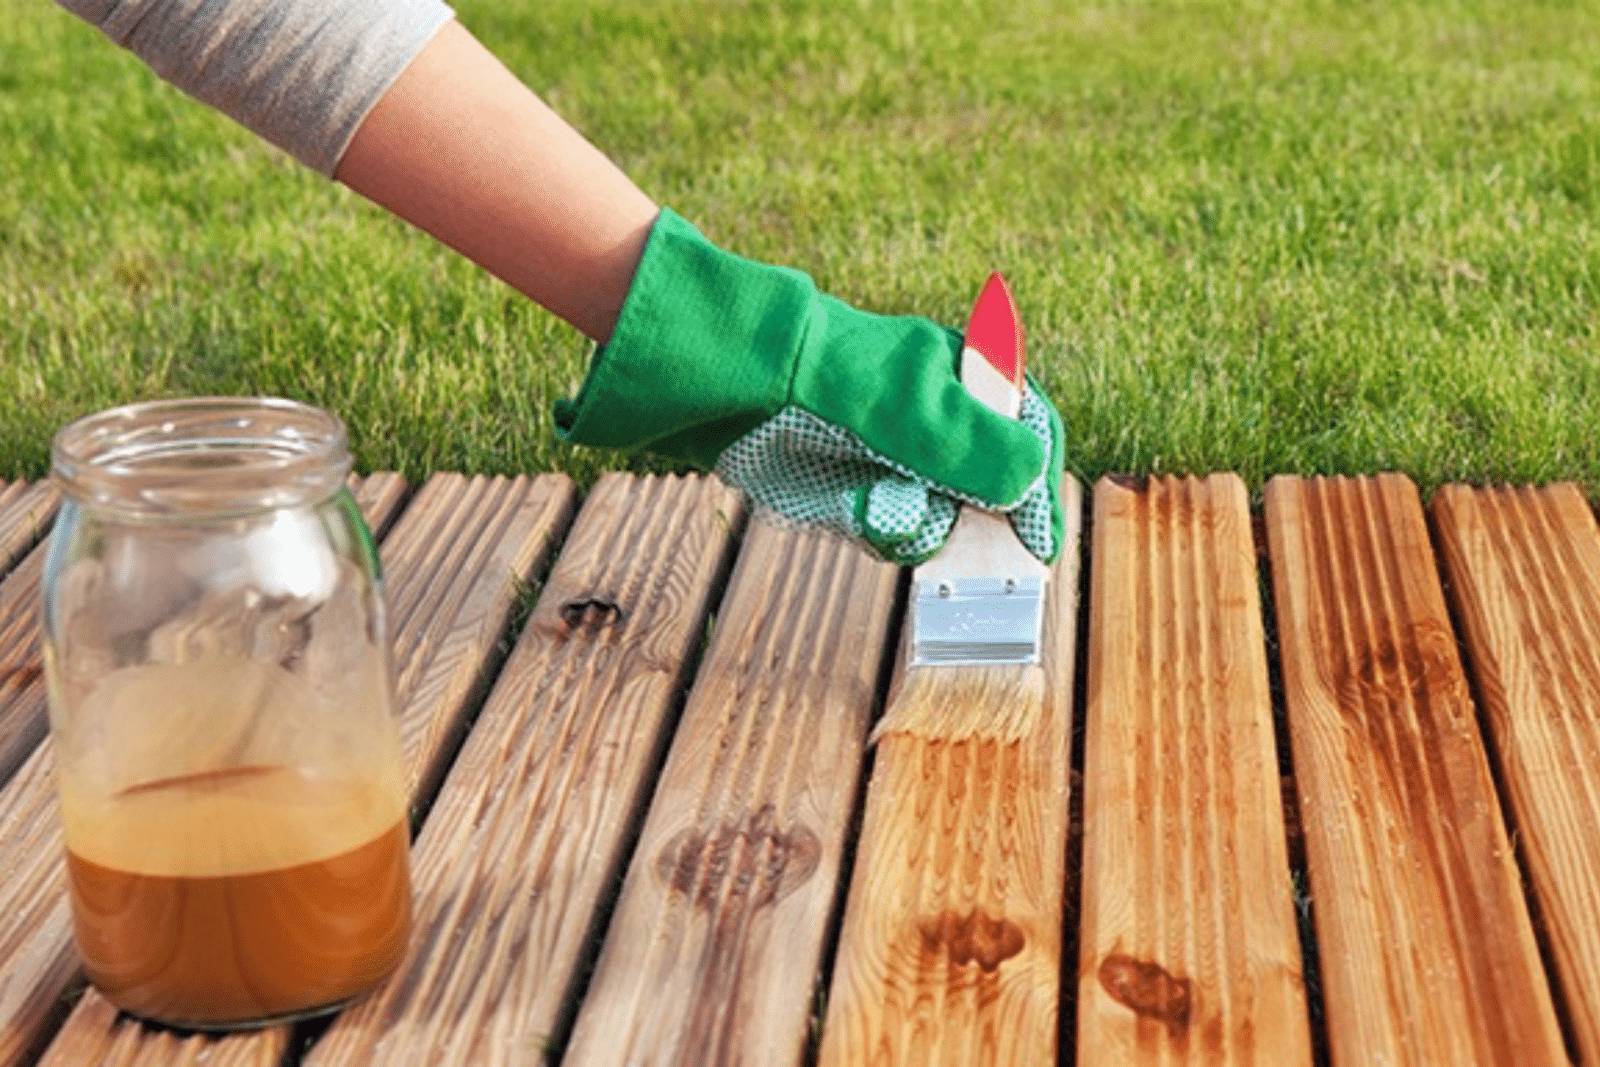
1. Using a Waterproofing Sealant
Choosing the Right Sealant
- Oil-based sealants: Provide a natural finish and penetrate deep into the wood.
- Water-based sealants: Environmentally friendly and easy to clean up.
B Application Process
- Prepare the Wood: Sand the surface to remove any previous finish or rough spots.
- Clean the Surface: Wipe down the wood to remove dust and debris.
- Apply the Sealant: Use a brush or roller to apply evenly, following the wood grain.
- Allow to Dry: Refer to the sealant’s instructions for drying time.
2. Using a Waterproofing Stain
A stain with waterproofing properties can add color while protecting the wood.
- Choose the Stain: Select a color and type (oil or water-based).
- Prep and Apply: Similar to the sealant method.
3. Create a Moisture Barrier with Paint
Regular exterior paint can act as a moisture barrier when applied over a primer.
- Prime the Wood: Apply a suitable primer.
- Paint the Wood: Use a quality exterior paint.
Here’s a more detailed look at sealants and their application:
Types of Sealants
1. Oil-Based Sealants
- Composition: Typically made from natural oils like linseed or tung oil mixed with resins.
- Properties: Penetrate deep into the wood, enhancing the natural color and grain.
- Usage: Often used on decks and outdoor furniture.
2. Water-Based Sealants
- Composition: Made from acrylic or other synthetic resins suspended in water.
- Properties: Environmentally friendly, easy to clean up, and less prone to yellowing.
- Usage: Suitable for both indoor and outdoor wood.
3. Polyurethane Sealants
- Composition: A type of plastic resin that can be water or oil-based.
- Properties: Extremely durable and available in various finishes from matte to glossy.
- Usage: Used on floors and high-traffic areas.
4. Wax-Based Sealants
- Composition: Made from waxes, often blended with oils.
- Properties: Offers a soft finish that repels water but may need frequent reapplication.
Usage: Ideal for smaller projects or decorative pieces.
5. Silicone-Based Sealants
- Composition: Made from silicone polymers.
- Properties: Highly water-resistant and flexible but may not be suitable for all wood types.
- Usage: Often used in combination with other sealants to provide added protection.
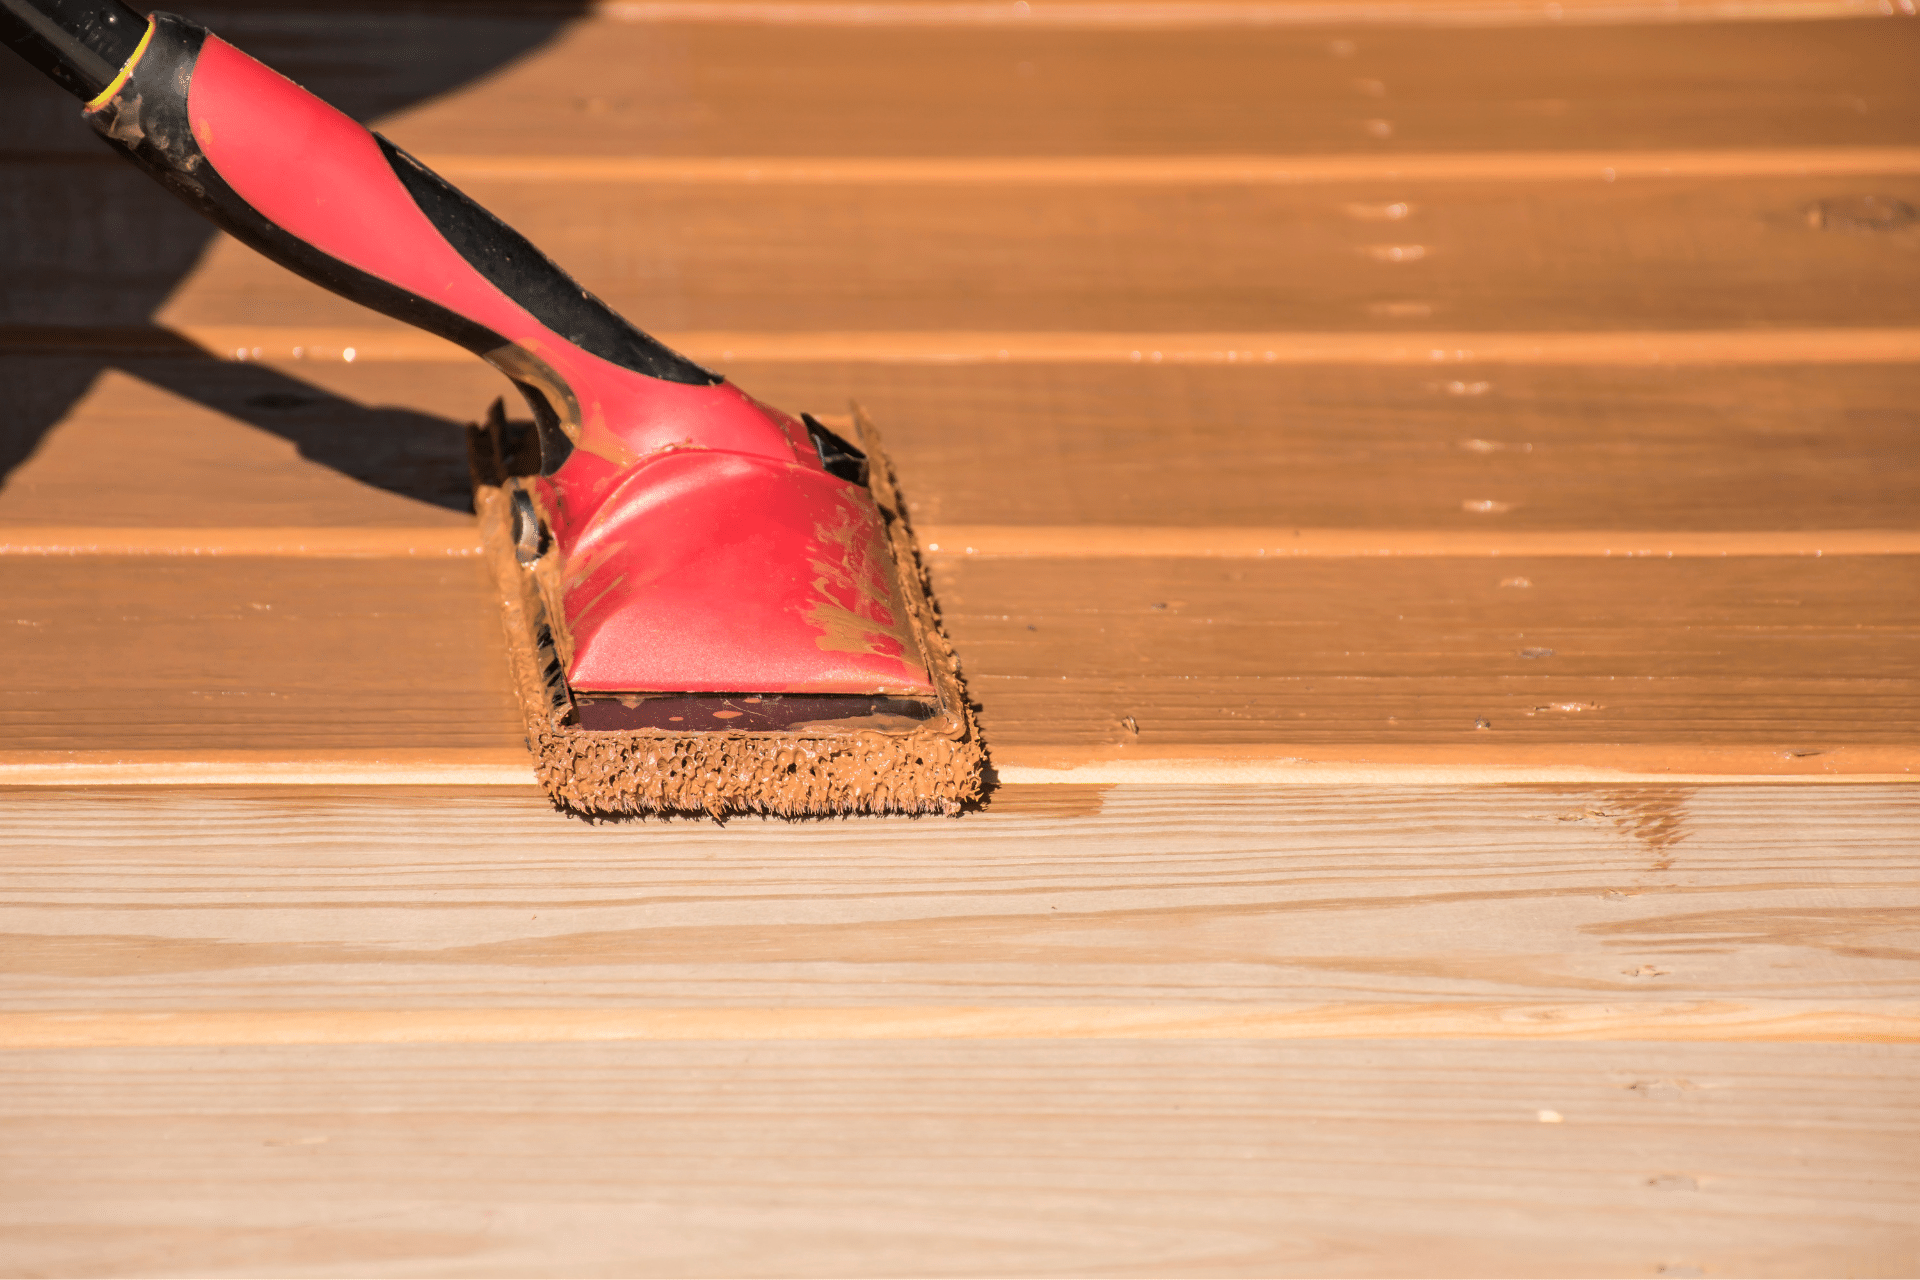
Application Process
-
Preparation
- Clean and Sand: Ensure the wood is clean, dry, and sanded smoothly.
- Tape Off Areas: If necessary, tape off areas that you don’t want to be sealed.
-
Apply the Sealant
- Choose the Right Brush: A natural-bristle brush is usually suitable for oil-based sealants, while a synthetic brush is better for water-based ones.
- Follow the Grain: Apply the sealant in the direction of the wood grain.
- Number of Coats: Multiple coats may be needed, especially for outdoor applications.
-
Drying Time
- Allow to Dry: Refer to the product’s instructions for drying time between coats and before use.
-
Maintenance
- Regular Inspection: Check for signs of wear or damage.
- Reapplication: Depending on the method used, reapply the sealant or paint as needed.
- Reapply as Needed: Depending on exposure and wear, periodic reapplication may be necessary.
Choosing the right sealant and applying it properly is key to successful waterproofing. Understanding the different types of sealants and their respective properties, applications, and maintenance requirements can help you make the best choice for your specific wood project. Always follow the manufacturer’s guidelines for the best results.
Preparation Steps Before Waterproofing Wood
Preparation is a crucial step before waterproofing wood, and it’s often what ensures a successful and long-lasting application of the waterproofing product. Here’s the preparation steps:
- Inspect the Wood: Check for any signs of damage or decay. Repair or replace damaged sections as needed.
- Clean the Wood: If the wood has been previously treated or is dirty, it may require thorough cleaning. A mixture of mild detergent and water can be used, or specialized wood cleaners are available. Pressure washing may also be suitable for some applications.
- Sand the Surface: Sanding the wood smoothens any rough spots and helps to remove previous finishes or paint that may interfere with the waterproofing. Start with a coarser grit sandpaper and finish with a finer grit for a smooth surface. Be sure to sand in the direction of the wood grain.
- Remove Dust and Debris: After sanding, it’s important to remove all dust and debris from the wood’s surface. A tack cloth or a soft, damp cloth can be used for this purpose.
- Allow the Wood to Dry: If the wood is damp, it should be allowed to dry thoroughly before applying a waterproofing product. This can usually be done by letting it sit in a dry environment for a few days.
- Tape Off Areas: If there are areas you don’t want to be treated, use painter’s tape to protect them.
- Follow Specific Product Guidelines: Always read and follow the instructions provided by the manufacturer of the waterproofing product you are using. They may have specific preparation recommendations for their product.
By carefully following these preparation steps, you ensure that the wood is in the optimal condition to receive the waterproofing treatment, allowing for better penetration and adhesion of the product, and resulting in a more effective and longer-lasting waterproofing.
When Should You Waterproof Wood
Timing can have a significant impact on the effectiveness of the waterproofing treatment. Here are some key factors that can guide you on when to waterproof wood:
1. New Wood
- Allow for Curing: If the wood is freshly cut or purchased, it may need time to dry and cure. The moisture content should ideally be below 15%.
- Seasonal Considerations: Applying waterproofing during a dry season or in low-humidity conditions can facilitate proper curing and adhesion.
2. Existing Structures and Furniture
- Regular Maintenance: Structures and furniture that are constantly exposed to weather should be inspected regularly, and waterproofing should be reapplied as needed.
- After Cleaning or Sanding: If the wood has been cleaned or sanded, it must be allowed to dry completely before applying waterproofing treatment.
3. Before Exposure to Elements
- Outdoor Structures: If you’re building something that will be exposed to rain or moisture (like a deck, fence, or outdoor furniture), it’s wise to waterproof the wood as part of the construction or finishing process.
4. Climate Considerations
- Ideal Temperature Range: Most waterproofing products have an ideal temperature range for application. This is usually between 50°F and 90°F (10°C to 32°C). Check the product instructions for specific guidance.
- Dry Weather: It’s best to apply waterproofing products during dry weather, as rain or high humidity shortly after application can affect the curing process.
5. Type of Wood
- Porous Woods: Softer, more porous woods may require more frequent waterproofing or may need to be treated sooner after purchase or cutting.
6. Signs of Wear or Damage
- Regular Inspection: If you notice signs of wear, fading, cracking, or other water-related damage, it might be time to reapply a waterproofing treatment.
In summary, the timing for waterproofing wood depends on various factors, including the type of wood, its condition, its intended use, and environmental factors.
By considering these aspects, you can determine the best time to waterproof the wood, ensuring optimal protection and longevity.

Safety Guidelines When Waterproofing Woods
- Always use proper personal protective equipment (PPE) such as gloves and goggles.
- Work in a well-ventilated area to minimize inhalation of fumes.
Safety considerations are paramount when waterproofing wood, as you may be working with chemicals that can be harmful if not handled properly.
Here are some safety guidelines to follow:
1. Read Product Labels and Instructions
- Understand Warnings: Many waterproofing products contain chemicals that require specific handling and disposal methods.
- Follow Manufacturer’s Guidelines: Adhere to the specific instructions provided by the product manufacturer.
2. Use Appropriate Personal Protective Equipment (PPE)
- Gloves: To protect your hands from chemicals.
- Eye Protection: Safety goggles can prevent splashes from reaching your eyes.
- Respiratory Protection: If working with strong fumes, consider using a mask or respirator.
3. Ensure Proper Ventilation
- Work in Well-Ventilated Areas: This helps disperse fumes and minimizes inhalation risks.
- Avoid Enclosed Spaces: If working indoors, make sure to have windows and doors open, or use fans to circulate the air.
4. Handle Materials with Care
- Avoid Skin Contact: Some substances may cause skin irritation or other health issues.
- Avoid Ingestion or Inhalation: Be mindful of the way you handle materials, and wash your hands thoroughly after use.
5. Proper Storage and Disposal
- Store in Original Containers: Keep waterproofing products in their original containers, clearly labeled, and away from children and pets.
- Dispose of According to Local Regulations: Contact local waste disposal authorities to ensure you dispose of any leftover products and cleaning rags properly.
6. Use Proper Tools
- Avoid Using Food Utensils: Never use kitchen utensils for mixing or applying products.
- Clean Tools Properly: Follow instructions for cleaning brushes, rollers, and other tools to prevent contamination.
7. Consider Environmental Factors
- Avoid Working in Extreme Weather: Very hot, cold, or windy conditions can affect the application process and your comfort and safety while working.
8. Stay Informed and Educated
- Understand Material Safety Data Sheets (MSDS): Familiarize yourself with the MSDS of the products you’re using, which contain detailed safety and handling information.
By taking these safety considerations into account, you can ensure that your waterproofing project is not only successful but also conducted in a manner that minimizes risks to your health and the environment.
Waterproofing wood is not just a one-time task; it’s an ongoing process that requires regular maintenance. By understanding the methods and committing to regular upkeep, you can ensure that your wood structures remain beautiful and functional for years to come.


