
What Is Vinyl Plank Flooring?
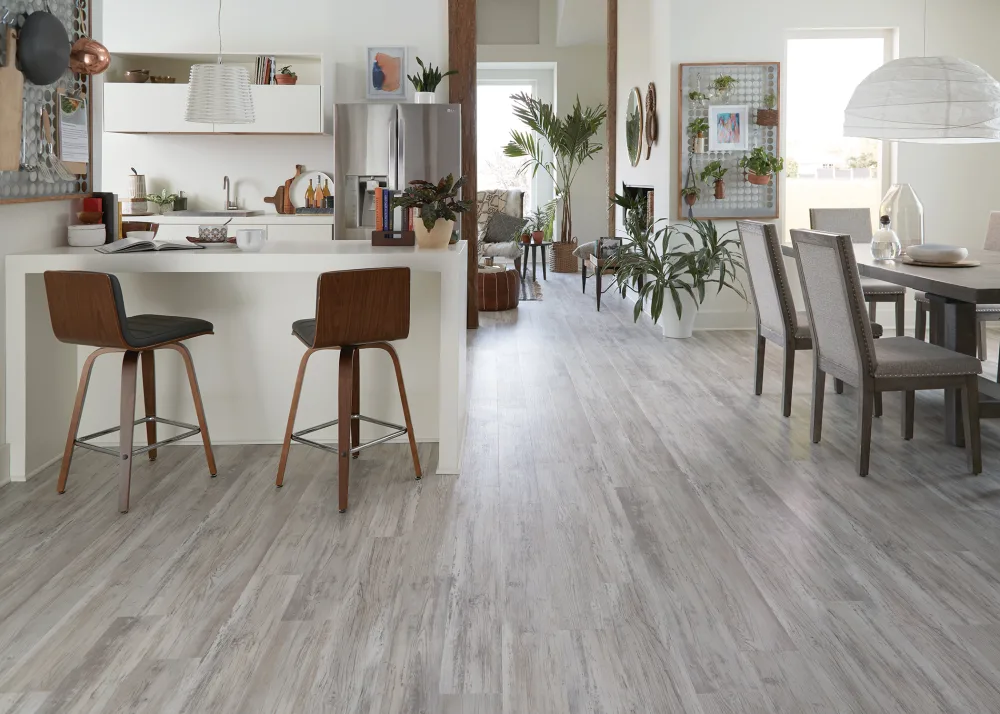
Vinyl plank flooring has been around since the 1930s, but this building material has evolved from mediocre patterns and uneven seams into gorgeous hyper-realistic-looking wooden planks. With its easy-to-install nature, vinyl plank flooring is an excellent option to give floors a sturdy and quick facelift.
Whether you want to change up your tiled or carpeted floors, consider vinyl planks. They’re also referred to as LifeProof flooring, and for a good reason. Vinyl plank floors are fully waterproof and are built to take the brunt of the wear and tear of daily life. If you’ve got kids, pets, and a generally busy household, vinyl plank flooring is a scratch-resistant, easy-to-clean option homeowners can look to if they want beautiful floors without breaking the bank.
How Much Does Vinyl Plank Flooring Cost?
Vinyl plank flooring, even luxury vinyl flooring, is on the more affordable end when it comes to flooring options for your home. You can have a good selection of LVP flooring within a $1-$5 range per square foot.
Determining the quality of the planks in accordance with their price is straightforward. The thicker and sturdier the material, the more expensive it is. Higher-end vinyl plank flooring, known as luxury vinyl flooring or LVF, comes with things like interlocking tongue-and-groove systems, built-in underlayments, and a waterproof barrier.
Installing Vinyl Plank Flooring: A Step By Step Guide
Even if you’re not confident with your DIY skills, vinyl plank flooring was designed to be easy to install, making it the easiest flooring material to work with. If you’re considering DYing it, read through this guide to help you decide if you’re up for the task.
Tools you’ll need:
Although this list isn’t exhaustive, the below tools are the basics you’ll need to help you install vinyl plank flooring with ease. Have them laid out and ready to use beforehand for an easy and efficient installation process:
- Vacuum to clean the subfloor
- A belt sander to even out raised areas on the subfloor
- Floor patch product and a trowel to fill in lowered areas on the subfloor
- Underlayment, if your subfloor is cement, wood, or uncushioned vinyl floors
- A hand roller to evenly apply pressure to vinyl planks as you roll them into place
- A dead blow hammer to hammer down plank edges together
- A carpenter’s square to trace out cuts you’ll be making on your planks
- A tape measure to ensure a roughly uniform plank size
- A cutter and/or scissors to cut vinyl planks when you need to adjust their size and shape
- Prepare Your Subfloor
You need to know the type of subfloor your vinyl plank flooring will go on top of. This will help you prepare accordingly. The end goal is to have a seamless, smooth, and clean floor that will make laying out pre-measured planks and any necessary underlayment easy. For a job well done, you need to give the planks a proper foundation to stick to.
On top of cleaning your subfloor, you’ll need to make sure it’s even. With a belt sander, sand down bumps and raised areas on your subfloor to ensure a smooth and even surface. With low spots, fill it in and patch it up to level using a trowel.
Do I Need Underlayment for Vinyl Plank Flooring?
Unless your chosen vinyl planks are designed with built-in underlayment, you do need underlayment for vinyl plank flooring to add extra cushioning, reduce sound, and provide an essential moisture-proof barrier.
Unless you’re installing over existing cushioned vinyl plank flooring or a below-grade tiled floor, you need vinyl plank flooring. For cement, wood, and uncushioned vinyl floors adding an underlayment is key.
- Lay Out Your First Planks
With pre-measured planks that are roughly the same length, lay out a ‘test fit’ of planks against a wall. Start from the center and work your way through the sides. Cut a ¼-inch gap from the wall and from each end. This space is called an expansion gap, which will accommodate the inevitable expansion in your flooring as temperatures change.
When you’re happy with the fit and comfortable with the installation technique for your planks, proceed to install the rest of your planks.
Depending on the plank brand and design you bought, there are slight differences in laying them down.
Types of vinyl floor planking you can choose from are:
Peel and stick flooring planks where you peel off the backing and then lay the plank down from the edge onto the previous row, then lastly roll it into place.
Tongue-and-groove vinyl planks are installed by sliding the current plank tongue into the groove of your previous plank, which you then proceed to tap into place.
For GripStrip vinyl plank flooring, you’ll want to butt your planks from each end. Afterward, press down on the adhesive strips using a hand roller to set them into place.
- Cutting Out Your Planks To Match The Flooring Area
Cutting vinyl plank flooring is easy and expected as you go about installation. Uneven corners, door frames, and floor ducts will need to be taken into account. To match the space, you’ll be laying the plank down, use a cutter and carpenters square, and either cut through the entire plank or make a partial cut before snapping off the vinyl plank. Alternatively, for planks that are thin enough, you can opt to cut them with scissors.
- Add In Your Bridge Molding
After your vinyl planks are laid out, cover your expansion gaps by adding bridge molding. Be sure not to nail it down, as it will prevent the vinyl planks from expanding. Pin the molding to align with the trim of the vinyl floor planks and not the subfloor.
Installing vinyl plank flooring is a fairly easy DIY job, so depending on how adept you are at home improvement tasks and how much floorspace you’re covering, you can expect to spend a day or two preparing your subfloor and laying down your vinyl planks.
While it may seem like a tedious process, installing vinyl floor planking is all about setting up the sublayer and then installing your planks according to the brand’s instructions. Of course, there are more nuances to installation, but if you’ve got a good subfloor ready and are initially familiar with how to install the specific vinyl planks you chose, doing your own vinyl plank flooring is as easy as it is rewarding.

